Thursday, February 4, 2021

Brown casual bag with callphone pocket at the back


I love making my own bags. It gives me a lot of satisfaction. I just finished the cellphone pocket and joining a few minutes ago, stitched the wooden button. I had previously put its base.

It is done in continuous round.

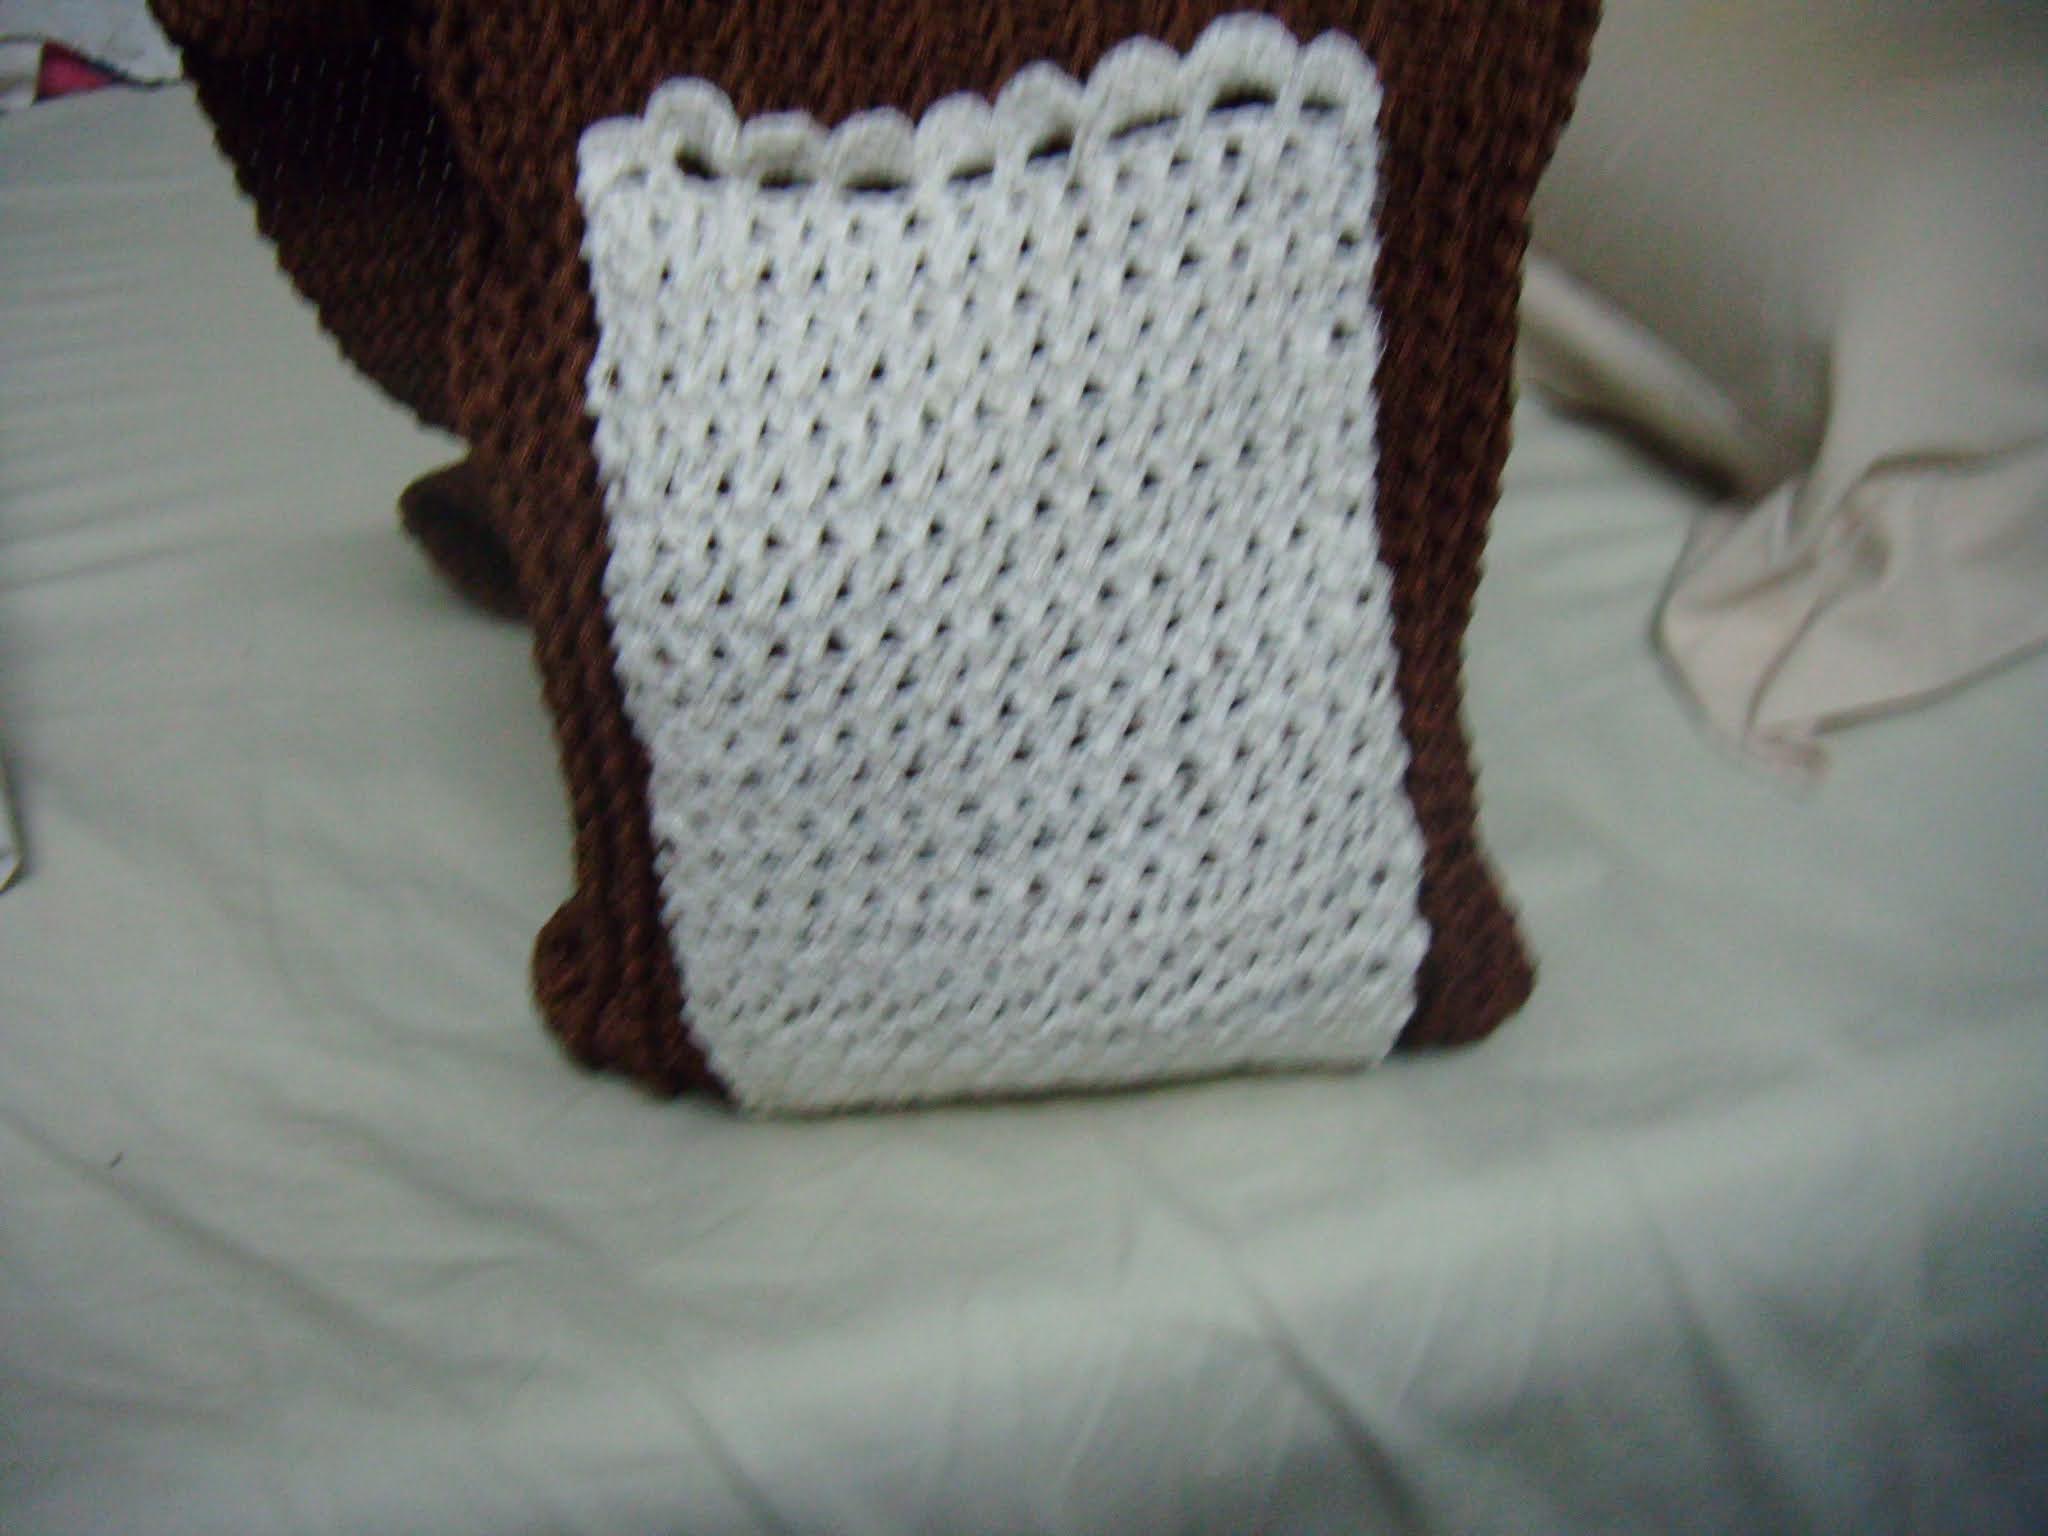
for the front back after doing a row of dc, in next row, I made 2 dc and the next dc is a long dc taken from around the loop of dc one row below. I continued like this. 

Next row 2 dc, long dc over long dc. then for the flap, I made ch, then in that ch, sc, hdc and dc, then again ch, next row, sc, 2 hdc, 2 dc, 2 hdc, sc in each loop around

next round was made with 5 ch till end

in each loop, made sc, 2 hdc, 3 dc, 2 hdc, sc all around, at the same time decreasing one loop on either side.

then for the button after doing sl st till the center group of st, made a ch according to the size of the button, skipped one st,sc, sl st in the next and weaved the remaining thread.

for handle from the last row made 10 ch, turned 1 ch,, 10 sc in each row till the desired length

for joining to the opposite side, joined with sc with the handle loops and joined in the correct place, then continued till the beginning of the other side with sl st,  then made the flap.

For my other blogs, I'm giving the links below, feel free to view and comment too.

https://cancersupportindia.blogspot.com. for all cancer and health related topics
https://gseasyrecipes.blogspot.com. feel free to view for easy, simple and healthy recipes
https://kneereplacement-stickclub.blogspot.com. for info on knee replacement


Tuesday, February 2, 2021

Small cross shoulder bag for a small girl

In the first photo, it is the back side, made a small buttonhole flower, put a small bead in the center, it is my own design.
In the 2nd, 3rd and last photo, it is the front side, where I made a rose and attached it. As, I didn't want to make a flap, before I'ld finish the bag, made 1 dc, 1 ch, 1 dc all around, so I'ld put the long sc chain that I made around the loops, so the girl can pull the strings to close  the bag, so her cell phone or whatever she wants to carry won't come out.
 

For my other blogs, I'm giving the links below, feel free to view and comment too.

https://cancersupportindia.blogspot.com. for all cancer and health related topics
https://gseasyrecipes.blogspot.com. feel free to view for easy, simple and healthy recipes
https://kneereplacement-stickclub.blogspot.com. for info on knee replacement


Scarf, done lengthwise


 I started this scarf by doing ch 352, as I wanted to do mini bean stitch, did a couple of rows with it. Then when I changed to cream color, I found that as the stitch has to be done sideways, it was pulling more than one loop, not coming neat. Hence, instead of doing sideways the stitch, on the gap, I drew a loop, then yo, drew one more loop, drew yarn from all 4 loops, so those who look carefully can make the difference between the stitches ! In the end, made ch over both the ends ( breadth ), as I made this for an 80 year old man, didn't want fringes or anything fancy.

For my other blogs, I'm giving the links below, feel free to view and comment too.

https://cancersupportindia.blogspot.com. for all cancer and health related topics
https://gseasyrecipes.blogspot.com. feel free to view for easy, simple and healthy recipes
https://kneereplacement-stickclub.blogspot.com. for info on knee replacement

Thursday, October 15, 2020

Green Crochet Bag


The 1st 2 photos are the back of the bag, where I made a cellphone pouch attached. It is all my own design.

3rd and 4th photo are the front side with a flap and instead of buttons kept 2 beads !

My little bag made with different stitches and the cellphone pouch attached at the back, also made with different stitches. I'm not very good in writing pattern, but hope this helps. In case anyone wants more detail, please free to ask. Good luck to all.

I prefer to make bags as one piece, than making small squares and joining, as I feel made as one piece will be sturdy.

For the cellphone pouch- I started with a long chain to fit my phone, then rows of sc, then 4 rows of Celtic stitch, which is like double cross, you skip 2 st, then make 2 dc, then make dc over the skipped st.

then some rows of dc, then rows of sc, then dc, 1 ch, skip one st, dc in next.

then again sc rows, then sc, 3 ch, skipped 2 st, sc in next, s

next row, sc, over 3 ch I made sc, hdc 3 sc, sc over sc till end same pattern repeated.

last row, sc, over sc- sc, 3 hdc- sc,then sc over sc. repeat.

I thought that I'ld attach the cellphone pouch with crochet, it was going to one side, so marked and attached with thread.

I always love to carry bags made by me. I had made one green bag, bigger than this, with space for bottle on one side and cellphone on the other side, my niece liked it, gave it to her, she said that it is perfect to put a change dress when she goes for a swim !

So, I didn't have a green bag, thought that I'ld make that can go with my green sarees !

For my other blogs, I'm giving the links below, feel free to view and comment too.

https://cancersupportindia.blogspot.com. for all cancer and health related topics
https://gseasyrecipes.blogspot.com. feel free to view for easy, simple and healthy recipes
https://kneereplacement-stickclub.blogspot.com. for info on knee replacement


Sunday, October 4, 2020

How to do a rectangle base for a bag


Normally when we crochet a long chain of the desired length, then do 2 sc in 2nd ch, sc till the last, in last ch 3 sc, turning, we do sc in each till the end and join.

What we get is an oval shape. I wanted a rectangle for the base of my bag

So, in the 2nd row onwards, in each corner st, made 2 sc and continued like that till the desired length I wanted. I got a nice rectangle.

I've not yet finished this bag, just wanted to show you all that you can make a rectangle in this way.

Good luck and good health to all. Praying for the pandemic to go away soon.   

For my other blogs, I'm giving the links below, feel free to view and comment too.

https://cancersupportindia.blogspot.com. for all cancer and health related topics
https://gseasyrecipes.blogspot.com. feel free to view for easy, simple and healthy recipes
https://kneereplacement-stickclub.blogspot.com. for info on knee replacement


Saturday, September 26, 2020


After making daughter's bag, I had 3 squares joined. I was in no mood to undo my efforts. Thought of making a smaller bag making 5 more squares. After I made the square with red, FO, then when I made another one, joined after doing a line with white sc, joined with white holding both pieces together and made sl st to join. After joining 4 squares for front and 4 for back , I made a long with dark brown thread, 11 ch, in 2nd chain from hook made sc, and then sc on remaining 9. I continued making sc in each row, turning at the end of row with a ch. I made this brown thread sc strip long enough to go over 3 sides and enough for the length of a handle that I wanted. Once I made the desired length, in stead of FO, I started joining with the side of the front squares on the back side outside, joined with sl st. all around 3 sides, then I FO. joined on the back square, holding ot both together joined then 3 sides, at last I joined to the top with sc. then FO.

You can make with any square and join in a similar way and make your own bag. Actually wanted to make a small flower and put below the flap to make it look more attractive.

Then I joined for flap, doing 1 row with sc, then sl at in 2 st on turning, sc till last 2, sl slt in 2nd last st, sc, turn,

sl st in 1st 2 st, sc till last 2 st, sl st n last but one, ch, turn around

sc in each st, ch, turn and continue to the length I wanted. Then FO, as I forgot to make loop for the button, where I wanted to put beads, I joined with red after leaving 5 sc on the flap, made 9 ch, joined on 7th from the end with sl st, sl st in next, FO weave the thread. 

Repeat for the 2nd beads on the other side, FO. I was happy to use my bag today when I went to the clinic and for some shopping. To be honest, taking my own creation, makes me feel happy, though it may not be anything great, but my effort has gone into making it, that matters to me.

If anyone wants any clarification, feel free to ask,, good luck to all.

For my other blogs, I'm giving the links below, feel free to view and comment too.

https://cancersupportindia.blogspot.com. for all cancer and health related topics
https://gseasyrecipes.blogspot.com. feel free to view for easy, simple and healthy recipes
https://kneereplacement-stickclub.blogspot.com. for info on knee replacement


Friday, September 11, 2020

Bag with a flap


I made this for our daughter, who wanted a big bag. I made with thick thread, so it can take weight. I made small squares, joined them. At first my idea was to join them differently, then changed my plan. Totally 9 squares,  3 in each row. I have stitched a red cloth inside, as there are small holes in the square pattern. As, I'm not sure how to stitch a zip, my friend who did for my earlier bags, is sadly no more, I preferred to put a flap and buttons for the bag.

For the side and handle, I made it long, then joined with crochet, as I didn't want to join with thread. Then just to add colour made single crochet on the handle. 

For my other blogs, I'm giving the links below, feel free to view and comment too.

https://cancersupportindia.blogspot.com. for all cancer and health related topics
https://gseasyrecipes.blogspot.com. feel free to view for easy, simple and healthy recipes
https://kneereplacement-stickclub.blogspot.com. for info on knee replacement