Wednesday, September 8, 2021

Crochet stitch directory

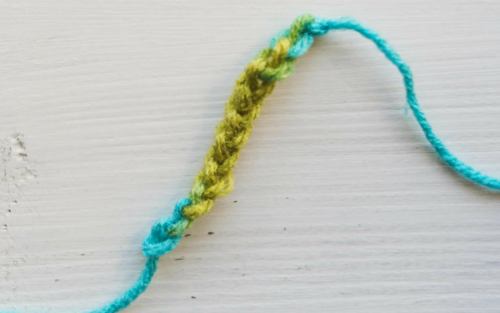
 Chain Stitch

How to Crochet the Chain Stitch

Chaining is the first step for starting crochet. It is possible to crochet a chainless foundation but otherwise, you will need to learn how to chain (ch). It's a simple stitch to learn and practice. We even have a Chain Stitch Video Tutorial for visual learners.

Double Crochet
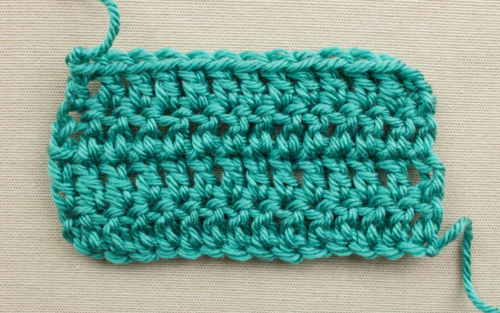
How to Double Crochet Video Tutorial

Watch our How to Double Crochet Video Tutorial to learn how to work up a beautiful crochet piece. This tag page also has tons of other tutorials, patterns, and videos to help you learn. Double crochet is a basic stitch that is abbreviated as dc.

Triple Crochet
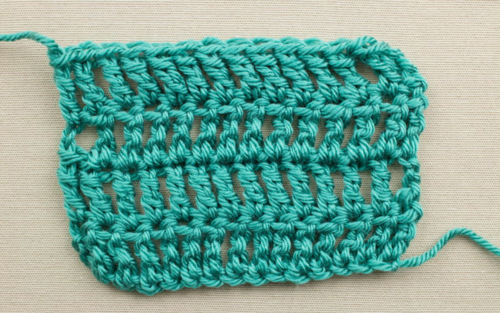
How to Triple Crochet Video Tutorial

Another basic crochet stitch, triple crochet has long rows that make your project work up quickly. Triple crochet is also known as treble crochet and is abbreviated as tr. Watch our How to Triple Crochet Video Tutorial and click to find more!

Cable Stitch
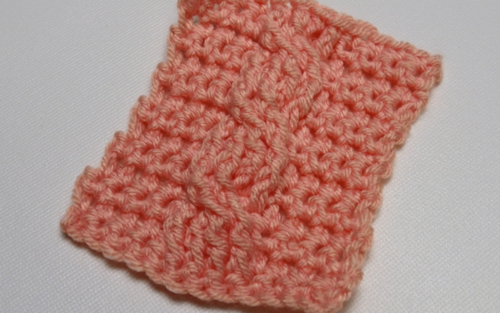
Cable Stitch Crochet Tutorial

The cable stitch is a beautiful pattern that resembles cabling, thus the name. Watch our video version of a​ Cable Stitch Crochet Tutorial to learn.​ Click to find many ways to use this stitch, from head warmers and gloves to pillows and blankets.

Shell Stitch
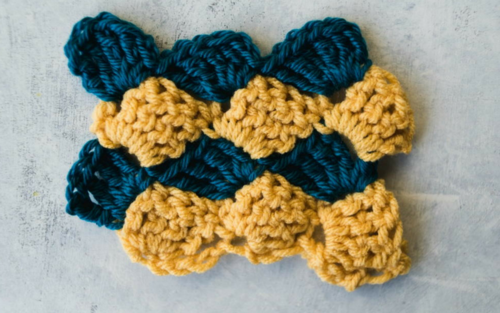
Vintage Crochet Shell Stitch

One of the most unique crochet stitches, the shell is named after the shapes that are created as you work it up. It would fit perfectly on a beach! We have many videos for this stitch, including a gorgeous Vintage Crochet Shell Stitch tutorial.

Basketweave Stitch
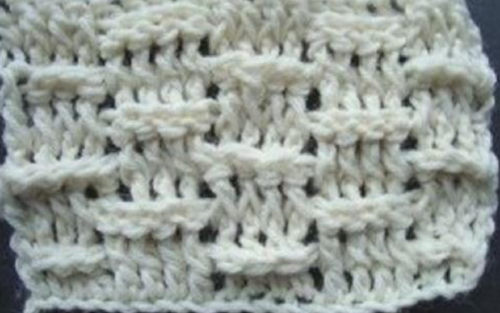
How to Crochet a Basketweave Stitch

This How to Crochet a Basketweave Stitch tutorial shows you step-by-step how to create this classic stitch. Once you see basketweave crochet, you will be able to spot it easily every time. It looks like a wicker basket yet it is done with yarn.

Popcorn Stitch
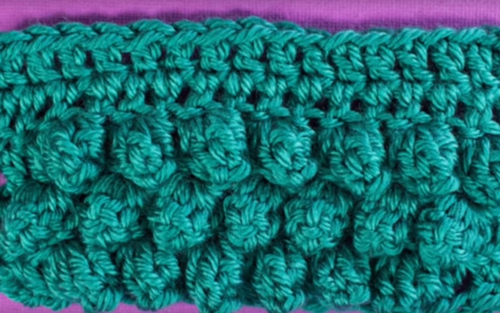
How to Crochet: Popcorn Stitch

When you see the popcorn stitch, you will know why it has that name. Watch our How to Crochet: Popcorn Stitch video tutorial to learn this unique stitch. If you have a lot of yarn you want to use up, this stitch is a great option for you to try.

Seed Stitch
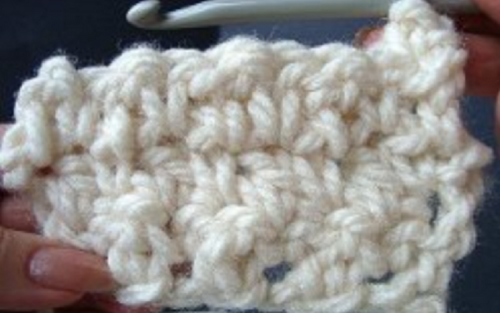
Crocheting the Seed Stitch

Also known as the moss stitch, the simple and pretty crochet seed stitch works up beautifully and can be used for all sorts of projects. From headbands and hats to baskets and afghans, click to find all the incredible things to crochet using it.

Catherine Wheel Stitch
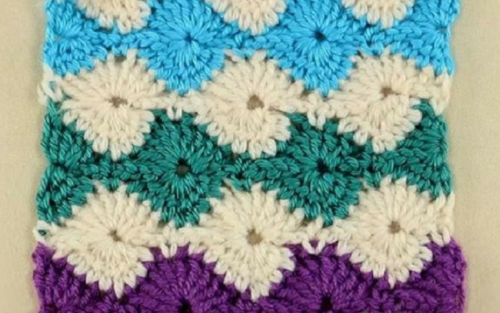
How to Crochet: Catherine Wheel Stitch

The Catherine Wheel stitch is such a beautiful and aesthetically-pleasing design. Watch the video for the Catherine Wheel Stitch from our sister site, AllFreeCrochetAfghanPatterns. Then click to find more exceptional circular patterns to make.

Broomstick Lace Stitch
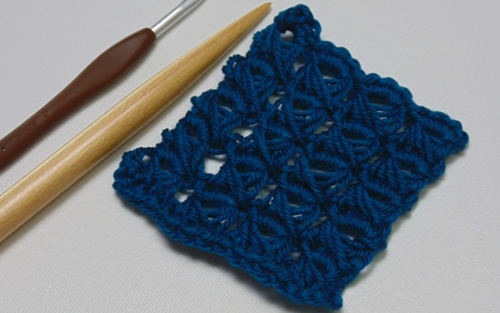
Broomstick Lace Crochet Tutorial

Delicate and distinctive, the broomstick lace stitch will transform any project into something museum-worthy. We have a Broomstick Lace Crochet Tutorial for you to watch and learn, along with so many pretty patterns you will want to check out.

Single Crochet
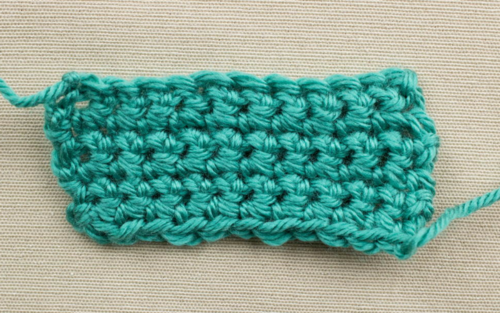
How to Single Crochet Video Tutorial

Single crochet is the basic stitch you will want to learn after mastering chaining. Watch our How to Single Crochet Video Tutorial and click to see all the projects you can make using single crochet (abbreviated as sc). ​Believe us, this will come in handy.

Half Double Crochet
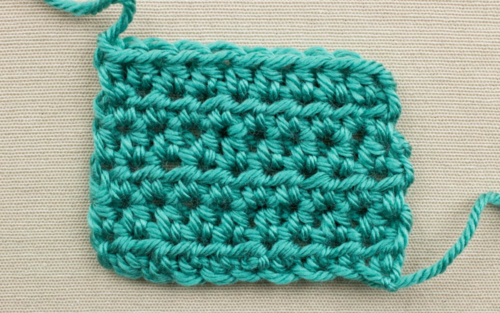
How to Half Double Crochet Video Tutorial

Watch our How to Half Double Crochet Video Tutorial to learn this crocheter-favorite-stitch. Most crocheters think that half double crochet (abbreviated as hdc) works up the fastest of all basic stitches. It's a basic stitch that is used often.

V-Stitch
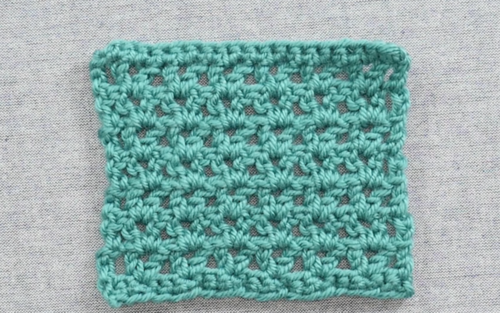
How to Crochet the V Stitch

The V-Stitch is found in many crochet patterns, either alone or combined with other stitches. Work this up and you will see the V-pattern it creates, thus the name. Click for patterns and watch our How to Crochet the V Stitch video to learn.

Tunisian Stitch
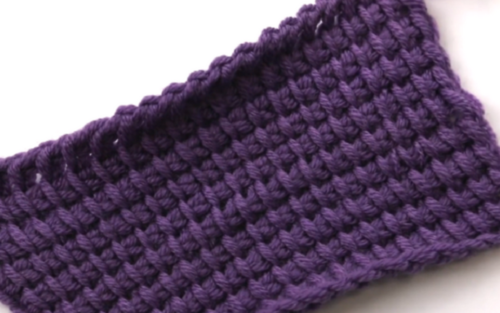
How to Crochet: Tunisian Stitch Tunisian crochet is unique in that it uses a special hook. It's much longer than a traditional hook but isn't difficult to master. It is also known as the afghan stitch. Watch a Tunisian Stitch video tutorial to learn and then check our patterns.

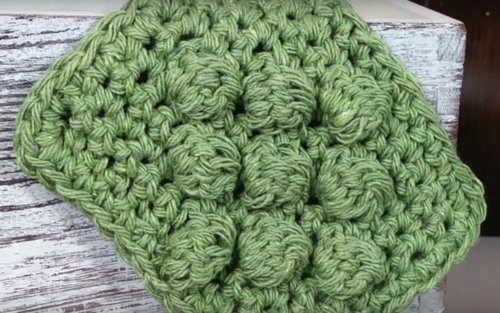
Bobble Stitch

How to Crochet the Bobble Stitch

Learn How to Crochet the Bobble Stitch with our video tutorial. You will see how the bobble stitch looks similar to the popcorn and puff stitches. It's one of the crochet stitches that has a ton of dimension and adds a lot to any crochet piece.

Picot Stitch
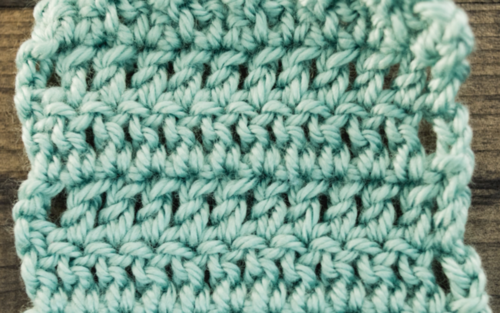
How to Crochet a Picot Stitch

The picot stitch creates little peaks and is often used as a border or edging. However, there is still a variety of other patterns that use this stitch as well. Learn How to Crochet a Picot Stitch before you tackle the amazing project ideas here.

Ripple Stitch
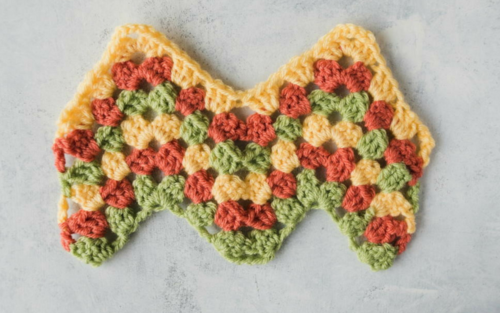
How to Crochet the Granny Ripple Stitch Tutorial

The ripple stitch is wildly popular for crochet afghans, but you will also find it in other patterns as well. It's also known as chevron because of the ripple pattern. Learn How to Crochet the Granny Ripple Stitch with our video tutorial, too!

Puff Stitch
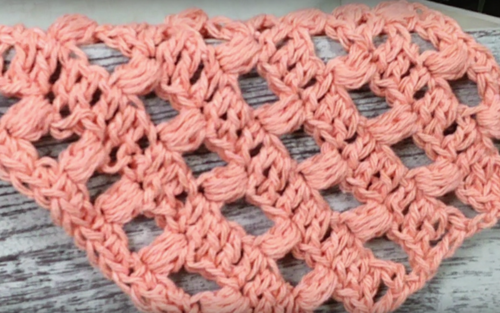
How to Crochet a Puff Stitch Tutorial

The puff stitch looks similar to the bobble and popcorn stitch but it doesn't have quite the 3D appearance. But it does make a stunning texture. Watch the How to Crochet a Puff Stitch Tutorial and click to see these textural patterns you'll love.

Crocodile Stitch
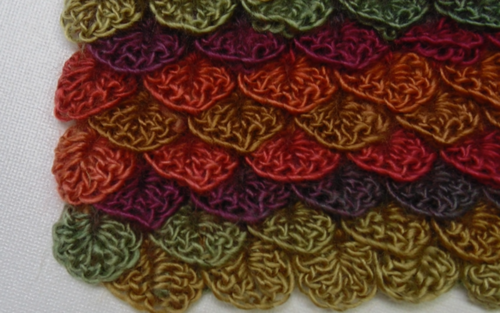
Edit Crocodile Stitch Crochet Tutorial

The crocodile stitch is one in this crochet stitch directory that you'll recognize right away. With its distinctive design of "scales," this stitch will turn a crochet project into something special. Click for our video Crocodile Stitch Crochet Tutorial.

Pineapple Stitch
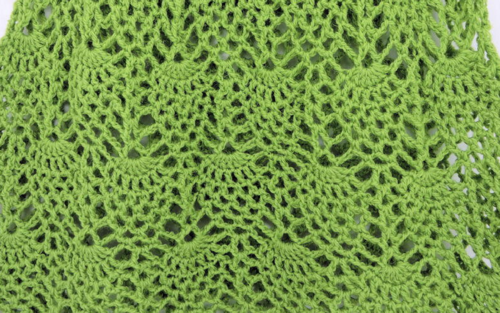
Pineapple Cascade Baby Dress

You may not be familiar with the pineapple stitch but it is an interesting one you will want to get familiar with right away. When you work this attractive design up, the end result is a dainty crochet creation that resembles pretty pineapples.

Corner to Corner
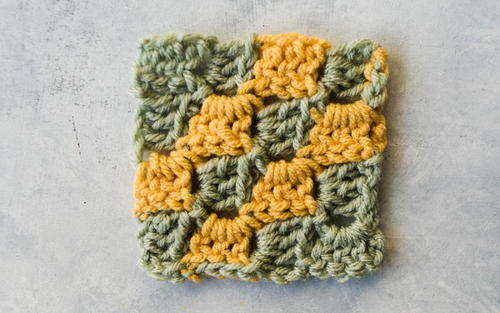
Corner to Corner Crochet Stitch

We have a few corner to corner tutorials, like the one for the main image above or How to Work Corner to Corner Crochet projects. It's more of a technique than stitch but it's so much fun to learn and use for crochet squares up through afghans.

Cluster Stitch
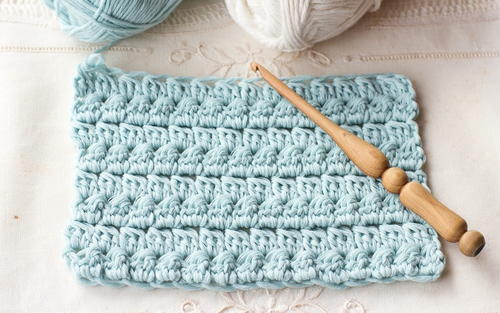
How To Crochet The Cluster Stitch

The cute crochet cluster stitch can be used to make everything from granny squares to scarves to hats to afghans. We even have a variation video tutorial for the 2 Double Crochet Cluster Stitch that adds even more pizazz to your cluster project.

Waistcoat Stitch
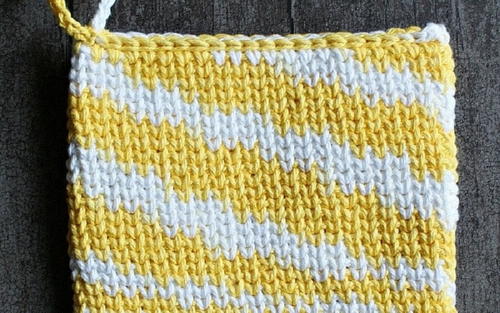
Waistcoat Stitch Potholder

The crochet waistcoat stitch is amazing because it resembles knitting. That's why this stitch is also known as the knit stitch. Learn how to crochet the waistcoat stitch and then find lots of projects. This tag page has several tutorials, patterns, and videos to help you learn. 

Waffle Stitch
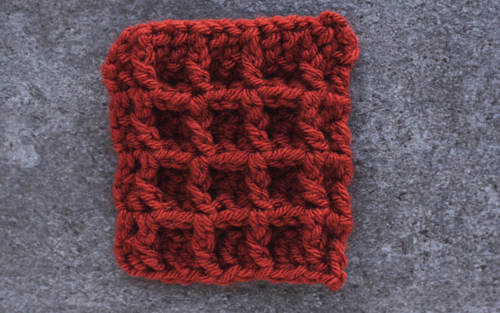
Crochet Waffle Stitch

This one might make you hungry. The waffle stitch creates amazing textures with heightened boxes, resembling waffles. Watch our video tutorial to learn how to crochet the waffle stitch. Check the tag page to find all sorts of incredible patterns using this stitch, too.

Star Stitch
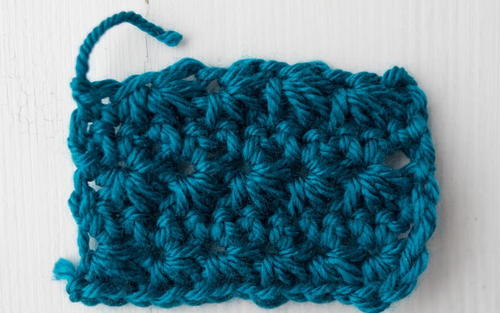
Crochet Star Stitch

If your seeing stars, we've done our job! The crochet star stitch is one of the most versatile stitches around. Watch our video tutorial to learn how to crochet the star stitch. Check the tag for this one to find pretty patterns using this stitch.

Tulip Stitch
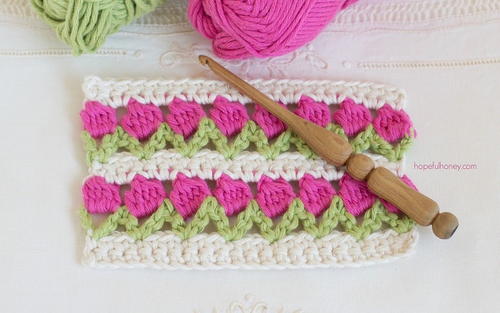
Tulip Crochet Stitch

The crochet tulip stitch is one of the most unique stitches you'll ever see. Also known as rows of tulips, it's stunning. There are even tutorials to learn how to crochet the tulip stitch available. Check the tag pages to find the most gorgeous tulip stitch patterns.

 Hi

fellow crocheters. I saw this article about various crochet stitches , wanted to share with all those who are beginners to benefit from this. Good luck to all and wish you all safe, healthy and happy during the difficult times that the world is facing. Keep smiling, it will make you feel better.

For my other blogs, I'm giving the links below, feel free to view and comment too.

https://cancersupportindia.blogspot.com. for all cancer and health related topics
https://gseasyrecipes.blogspot.com. feel free to view for easy, simple and healthy recipes
https://kneereplacement-stickclub.blogspot.com. for info on knee replacement


Monday, September 6, 2021

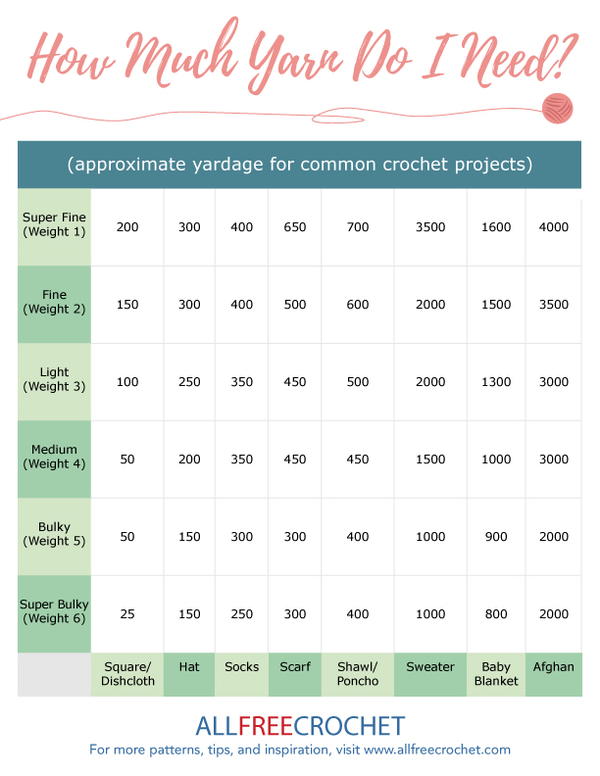
How much yarn will be needed for a project ?

Tips and Factors to Consider When Determining Yarn Amounts

Before we get down to specifics, there are a few things to keep in mind when buying yarn for a crochet project.

  1. What weight of yarn will you be using? The higher weight, the fewer yards/skeins you will need. So, if you're using a lightweight yarn, like fingerling, you may need two or three skeins of yarn when you would only need one or two of a worsted or bulky yarn.
     
  2. What is the size of the item you are crocheting? For clothing, consider whether it's a child or adult size before buying yarn. As far as crochet blankets go, you're also looking at a lot of size options.
     
  3. What types of stitches will you be using? Every stitch uses up a different amount of yarn. A Single crochet is going to use a lot less yarn than a bobble stitch. Be aware of the "yarn eater" stitches and buy more yarn if needed.
     
  4. What size crochet hook will you be using? If you crochet, then you know that using a different size hook on a pattern will change the size since the stitches are closer together or farther apart.
     
  5. What is your typical tension and gauge when crocheting? Or, what is the recommended gauge for the crochet pattern you're using? The gauge and tension is going to make a difference with the amount of yarn used because it allows for more or less space between stitches.

How Many Yards in a Skein of Yarn?

Because yarn is sold by weight, the number of yards in a skein is always different. 

"The yardage given is an estimate and is the least amount of yarn you will encounter in the skein; the actual amount may be more. Since yarn is sold by weight and not by yardage no two skeins of yarn will have the exact same yardage."

A typical skein of worsted weight yarn is roughly 364 yards and weighs 7 ounces.

The fact that yarn is sold by weight and not length makes it slightly more difficult to determine how many yards you will have when buying skeins and balls of yarn, but the estimate on the packaging label helps.

As mentioned earlier, you also have to consider the weight of the yarn and the type of stitches you will be using for your project. When in doubt, round up.


Yarn Yardage Chart (approximate)
Yarn Weight/Type Hat Scarf Sweater Afghan
1 Super Fine 300   650   3500  4000
2 Fine
300   500   2000
 3500
3 Light 250   450   2000  3000
4 Medium 200   450   1500  3000
5 Bulky 150   300   1000  2000
6 Super Bulky 150   300   1000  2000

How Much Yarn Do I Need? Yardage Yarn Chart


For my other blogs, I'm giving the links below, feel free to view and comment too.
https://cancersupportindia.blogspot.com. for all cancer and health related topics
https://gseasyrecipes.blogspot.com. feel free to view for easy, simple and healthy recipes
https://kneereplacement-stickclub.blogspot.com. for info on knee replacement


Sunday, August 22, 2021

Tips for crocheting with arthritis hand

 Can you crochet with arthritis?

Absolutely. In order to crochet with arthritis, you just need to make sure to take extra steps (like stretching and buying ergonomic hooks) to ensure that you protect yourself from further aches, pains, and damage.

Crocheting with hand and joint pain can be really difficult. It doesn't take much discomfort to make the once-relaxing hobby seem stressful and painful. Many crocheters deal with the symptoms of arthritis and have to find ways to enjoy their hobby happily while still taking care of their condition. While it is true that crocheting and arthritis will never be the perfect pair, this sort of pain and discomfort does not have to stop you from hooking beautiful projects and patterns. 

Changing How You Crochet for Arthritis Relief

In order to crochet with arthritic hands and wrists, you will need to alter how you usually crochet. The truth is that you will have to work with your pain instead of around it. Ignoring your symptoms can make them so much worse. Plus, you could actually hurt yourself by pushing yourself too hard. Crochet should be fun, not something you grimace your way through. Try the following habits to make it an enjoyable experience.

Alternate Between Projects: Varying the projects you are working on and even the number of projects you make progress on in one session is a great way to make sure you are taking proper care of your hands. By switching from one project to another, you give your hands a break. Each project comes with a different tension and type of yarn, so you will be crocheting differently. This micro-adjustments between projects ensure that you are not adding undue tension to muscles and joints. 

Types of Projects to Work On: If your pain is especially bad or your symptoms include stiffness, it might be time to change the kind of projects you work on. Crocheting intricate projects with fine and lightweight yarn includes more stitches, tighter tension, and more time spent. When your symptoms are bad, try working on worsted weight projects that use larger hook sizes.

Adjust Your Tension on Sore Days: On sore days, it is going to be harder to crochet. Depending on the weather or the time of day, how bad your symptoms are can change. This means you need to adjust your tension. Make sure you have a handful of projects you are working on at once, allowing you to crochet lighter tension projects when you need to do so.

Lights and Seating

Another thing that might not occur to all crocheters is that where you crochet and how well you see your project can actually impact the pressure and tension you put on your hands. If you're sitting awkwardly or pausing frequently to recount stitches, this can really cause tension in your hands as you might be gripping mid-stitch or tensing your muscles. We recommend the following changes to your space:

Work on Your Posture: Sitting on a straight-backed chair can help ease tension in your hands. Your shoulders, arms, and hands are all connected, meaning tension in one leads to another. Slumped shoulders can only make the problem worse.

Have an Arm Rest: If you have somewhere to set your elbows down and place projects in your lap on a flat surface, this eliminates tension in your wrists and fingers as you are not holding up too much weight.

Get a Lamp: A simple desk lamp or reading light will do the trick. Being able to see clearly will make sure that you are not squinting or pausing during hooking. This can actually alleviate tension and pain as you continue with a fluid motion instead of stopping uncomfortably.

Wear Your Glasses!: Just like the tip above, wearing your reading glasses or everyday glasses is imperative. If you're squinting or slouching towards your project it can hurt you back and ruin your posture, continually placing undue pressure on your aching joints and wrists as you lift them closer.

Do Not Crochet First Thing in the Morning or Late at Night: These times of the day are when your crochet symptoms will be worse. Your body has not had a chance to wake up, meaning your hands have not warmed up. Make time to crochet when you are at your best so that the process is fun and easy.

Have Someone Watch You Crochet: Whether you check in with an expert crocheter or doctor, this can be immensely helpful. Have someone take a close look at your hands and hook while you crochet for a few minutes, they might be able to identify ways in which you are holding your hook that could be doing more harm than good. Changing your crochet posture can be hard, but it is worth the extra effort. 

Have an expert crocheter or fellow crocheter "watch" you work to see if they can offer a new way to hold the hook that might offer relief.

Consult Your Doctor Regularly: As with any medical condition, it is important to be in contact with a healthcare professional. If your pain gets worse or changes, let your doctor know. He or she might be able to provide some tips and tricks for the pain. Always be honest with your doctor about your pain level and stiffness.
 

Taking Care of Your Hands

One of the best ways to care for yourself while crocheting and dealing with arthritis symptoms actually has nothing to do with HOW you crochet. It focuses on what you do before and after you crochet. You need to make sure you are taking care of your hands, both by finding relief for your symptoms as well as implementing preventative measures. Try the following to keep your hands happy and healthy:

Heat: One of the best ways to relieve pain in the hands and joints is through heat. Heat will soothe the swollen parts of your joints and help you relax. Before and after you crochet, consider soaking your hands in warm water. This will help you unwind. You can even toss in some essential oils for aromatherapy. 

Massage: Giving yourself a hand massage before, during, and after crocheting is a fantastic way to alleviate the tension from repetitive motion. It also gets the blood flowing in your hands, helping with circulation, which can actually stave off some arthritis symptoms like pain and stiffness.
 
Stretching: One thing to keep in mind when you are crocheting on ailing and sore joints is that you have to be extra careful with yourself and make sure you are not pushing yourself too hard. This means treating a crochet session like exercise. Just like you would stretch out before a big run and after, you should do the same when crocheting. This will make sure that your hands are ready to work!

Paraffin Wax Treatment: One thing many of our readers swear by is giving your hands the paraffin wax treatment often. Paraffin wax helps to relieve the symptoms of many painful conditions like arthritis and fibromyalgia. 

Crochet Tools for Arthritic Hands

The number one way you can ease the stress and pain of crocheting with arthritis is by using the correct equipment. Making changes to your crochet hooks, for example, will make a world of difference. Crocheting means you are performing repetitive motions over and over again with tired joints. Anything you can do to provide support and alleviate the tension and pressure you place on your joints, wrists, and hands can work wonders. 

Crochet Hooks for Arthritis Sufferers

If you currently crochet with simple, metal hooks, changing what kind of hook you use to crochet is going to make a world of difference. You will likely be shocked by how comfortable these crochet hooks can be! There are a ton of crochet hooks for arthritis out there.

Which option you use is really up to you and what kind of pain you are managing. Every crocheter is different and every crocheter has different needs. We recommend exploring a few different options and finding out what works for you.

Make York Own Ergonomic Crochet Hooks

Not ready to invest in brand new hooks or need to save some money? There are a few DIY options. Check out these projects!

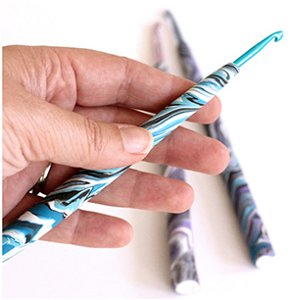
  1. Funky Polymer Crochet Hook Handles - The polymer clay added to typical aluminum handles provides an easier and softer grip. You can probably make these with hooks you already have.
     
  2. Recycled Crochet Hook Holders - This simple tutorial shows you how to add crochet hooks to old pens! Pick a pen that's comfy on your hands (especially one with a grip) and try it out.
DIY Crochet Hooks for Arthritis

Compression Gloves (Crochet Arthritis Gloves)

Another great addition to your crochet toolbox is a set of nice compression gloves. These gloves help relieve the aches and tension from crocheting with arthritis as they serve to protect your hands and pad the repetitive movements. They are specifically designed to support vital parts of your hands. Check out some of our favorite brands below.

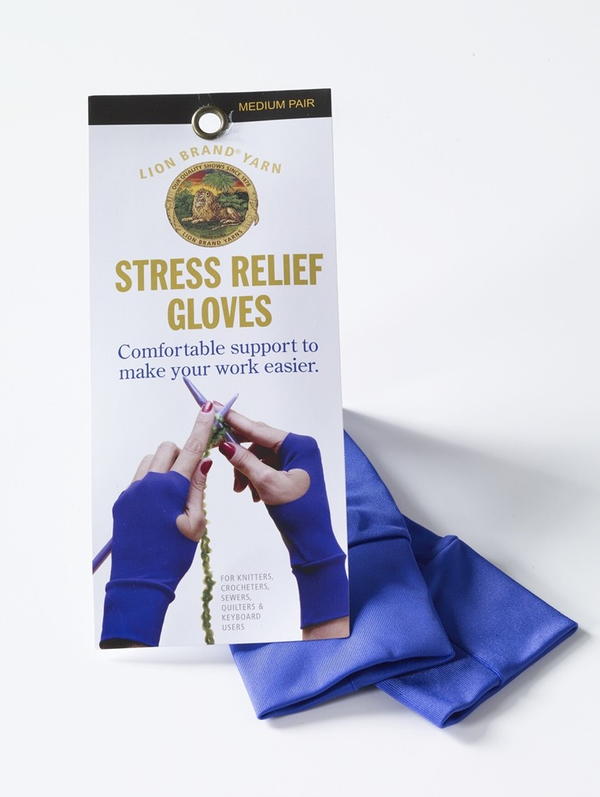
  1. Lion Brand Stress Relief Gloves ($15.99) - Designed especially for crochet and knitting, these gloves were created to massage muscles and enhance blood flow without restricting movement.
     
  2. Crafter's Comfort Gloves ( $12-$13) - These gloves are comfy and made of cotton. Designed especially for hand pain and swilling, they come in three sizes, making sure they fit perfectly.
Compression Gloves (Crochet Arthritis Gloves)  
One can do stretching of the fingers, by placing hand on the table and spreading fingers as far as possible. Then trying to hold the thumb by one finger at a time for 10-20 seconds each. Squeeze a soft ball for 15 seconds, relax and repeat for 10 times, do these exercises 2-3 times in a  day. 


For my other blogs, I'm giving the links below, feel free to view and comment too.
https://cancersupportindia.blogspot.com. for all cancer and health related topics
https://gseasyrecipes.blogspot.com. feel free to view for easy, simple and healthy recipes
https://kneereplacement-stickclub.blogspot.com. for info on knee replacement

Saturday, August 21, 2021

Crochet Hat Too Big: 6 Ways to Resize a Finished Pattern

This is a common problem with crochet hats, especially for newbie crocheters. Making the leap from a flat project like a scarf or blanket can be tough.

Pretty much every experienced crocheter has had a crochet hat end up far too large. If your crochet hat is too big, don't worry! There are actually ways that you can adjust the size of the final product without removing all of your stitches. Some simple stitches, added ribbon, or a hot bath might transform your project into a perfectly proportioned piece.

Suggestions for How to Resize a Hat:

1. Wash and Dry in High Heat
Just like other pieces of clothing, you can wash and dry your crocheted projects in high heat in order to help them shrink. This is a great idea for those items that are way bigger than you expected. One thing to keep in mind, however, with this technique is your make of yarn. Some yarns shrink more than others and too high of a temperature might damage synthetic yarns

2. Surface Crochet on the Finished Product
Surface crochet refers to crocheting on the outside of a pattern. This is a fun way to add new elements and texture. You can also use this to tighten up your hat by crocheting tight elements, by doing slip stitch in the last row.

 3. Add a Pull String
Weaving in a simple string around your hat to pull it tighter is an easy fix to this problem. The hat might look a bit big and bulky, but if you are creating a slouchy hat this is a great option.

4. Add Elastic
Hooking or sewing elastic into the rim of the hat can also create a smaller circumference. This is ideal for bulky, slouchy hats as it will only resize the brim of the hat and not the whole piece. 

 
5. Take Out a Few Rounds
Depending on how much bigger your hat is than needed, sometimes taking out just a few rounds (up to 3-5) can make it fit just right. This is also an option for hats that have stretched on their own.

6. Take it Apart and Redo It
Sometimes, a crochet project does not work out the way we would like it to or a stitching error causes the entire final project to look less than perfect. There's no shame in redoing a project! In fact, a lot of crocheters pull out their stitches and redo a project, especially when the yarn is expensive.

For my other blogs, I'm giving the links below, feel free to view and comment too.
https://cancersupportindia.blogspot.com. for all cancer and health related topics
https://gseasyrecipes.blogspot.com. feel free to view for easy, simple and healthy recipes
https://kneereplacement-stickclub.blogspot.com. for info on knee replacement


Wednesday, August 18, 2021

How to Crochet Faster, even if you aren't a pro !

If you're a beginner crocheter you may think that crocheting faster only comes with experience, but, any experienced crocheter will tell you that anyone can be a quick crocheter.

Experience is only a small part of getting your project done quickly. You also need to pick the right weight of yarn, the proper crochet hook, and prepare your yarn beforehand just to name a few things.

earn how the different types of yarn can affect your speed, along with hook sizes. Learn how the pattern alone makes a huge difference in how fast or slow you can work.

We'll go over how to prep your yarn before you start, the importance of stretching and good posture, and more.

Understand the Different Types of Yarn

Yarn comes in different weights numbered from 0 – 7 (0 – Lace, 1 – Superfine, 2 – Fine, 3 – Light, 4 – Medium, 5 – Bulky, 6 – Super Bulky, 7 - Jumbo). If you want to work up a project quickly your best bet is to use a Bulky, Super Bulky, or Jumbo yarn. You will end up working fewer stitches and have a decent-sized project.

Understand and Choose the Right Hook Sizes

Just as yarn comes in different sizes, there are different sizes for crochet hooks. They come as small as 2.25mm and as large as 25mm. The larger the crochet hook, the quicker you will work. This goes hand in hand with your yarn weight since the bulkier the yarn, the larger the crochet hook you will use.


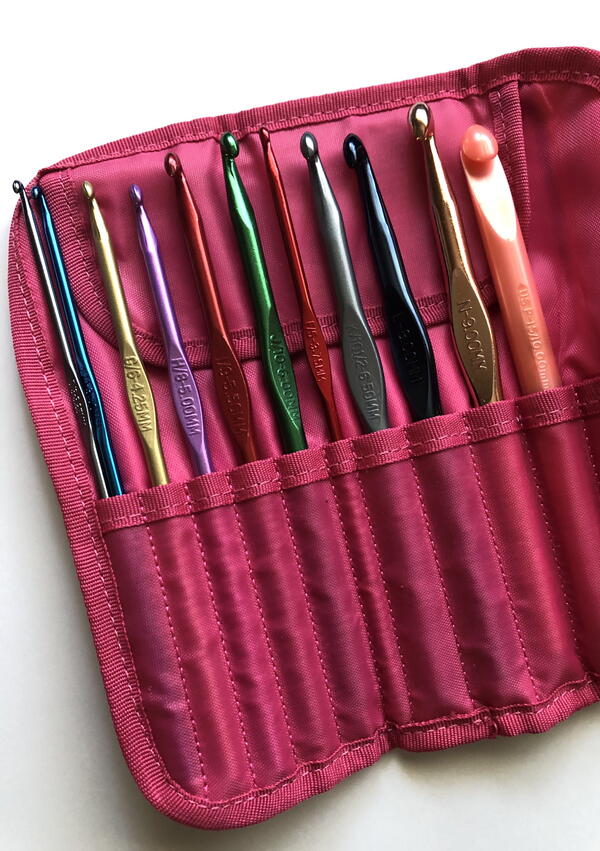
Image shows an open pink crochet hook case with hooks sitting inside.


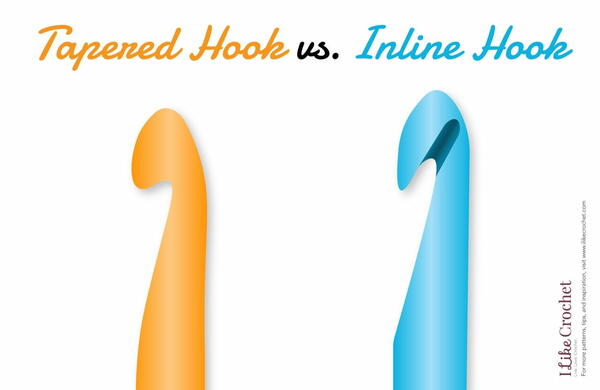
A lot of people prefer either inline or tapered crochet hooks, which can change how the yarn moves for each person. Learn more by visiting one of these guides from our friends:

  1. Inline vs Tapered Crochet Hook guide from I Like Crochet Magazine
     
  2. Inline Hooks vs. Tapered Hooks guide from Fiber Flux
Inline vs Tapered Crochet Hook 

Think Wisely When Picking a Pattern

Patterns with textures are always tempting and beautiful, but, if you want to work up a project quickly it’s best to pick a pattern with a simple stitch. Go with something like a chevron or ripple stitch.

It looks complicated but, it’s a pattern that once you’ve got the stitch pattern down you can work on it mindlessly. Save that cable or bobble stitch for when you have a little extra time on your hands.

Prep Your Yarn Before You Start Crocheting

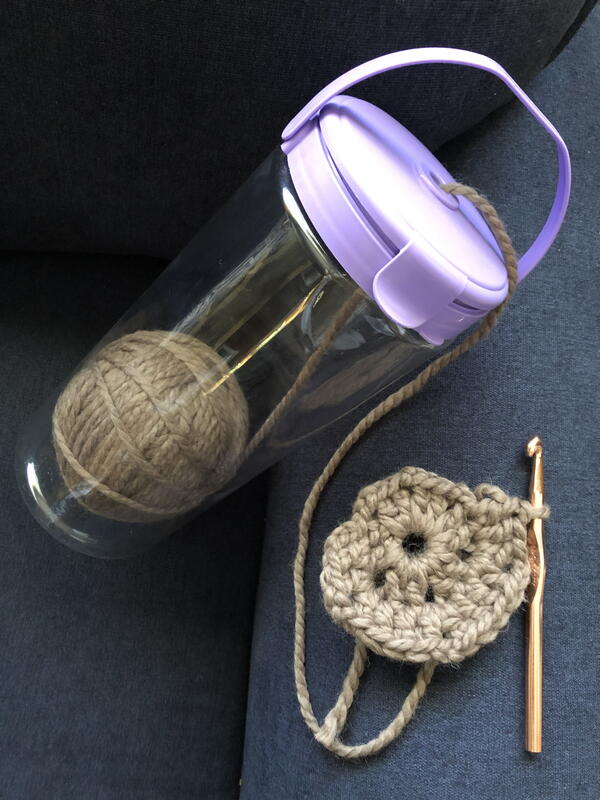
Instead of unwinding your yarn as you crochet, wind the yarn into a ball prior to starting your project. And, instead of letting it roll all over the place as you work, place the ball in a yarn bowl, tote bag, or in a yarn holder. This simple step will prevent your yarn from getting knots and tangles while you work with it.

Image shows a plastic water bottle type container with a ball of yarn inside. A strand of yarn is coming out the top hole and on the other end is a crochet circle piece in progress. There is a crochet hook attached to the piece.

Remember to Stretch Your Hands and Wrists

Before you sit down to start crocheting it’s important to stretch your wrists, hands and fingers. This will not only help in preventing pain, but it will also help to keep them flexible while you work.

Some stretches that you can do:

  1. Interlock your fingers with your palms facing away from you and then extend your arms out. Hold this stretch for 5 to 10 seconds. Rest and repeat this a few times. You can also do this same stretch by holding your arms behind your back with your palms facing up.
     
  2. Using your right hand stretch the fingers on your left hand by gently pressing them back and holding it for a few seconds. Repeat using your left hand to press back the fingers on your right hand.
     
  3. Open and close your fingers as you move your forearms back and forth.
Be sure to do one or all of these before you sit down to crochet and after you have been crocheting for a while to maintain the flexibility in your fingers and wrists. We also have a helpful guide for crocheters with arthritis. Check out Crocheting with Arthritis: A Guide to Pain-Free Hooking.

Find a Good Sitting Position

It’s not only important to make sure your fingers and wrists are ready to crochet, but that your whole body is as well. While we are all prone to slouching it’s ideal to have good posture while crocheting. Sitting hunched will not only tire your body out quicker, but you will end up with achy shoulders and neck pain.

Sit all the way back in a comfortable chair with cushioning and make sure you have ample lighting so you can see what you are doing. Avoid sitting on a hard surface or the floor which won’t provide any support for your back.

BONUS! Fastest Crochet Stitches

Although the way you crochet makes a huge difference, when you're crocheting basic or simple stitches, you will naturally move faster.

Single, double, and half double crochet, seed stitch, and similar quick to produce crochet stitches are going to be faster than something that involves more movements and actions, like the shell or v-stitch.

Obviously, the more comfortable you are with a stitch, the quicker it will be to crochet.
 

Now you've got all the information you need now to turn out beautiful crochet projects at lightning speed!

One thing for sure, most people roll the thread or wool around your finger, I also used to do that. After a while the finger hurts. Then, years ago, while we're in Germany, one of our friend taught me to glide the thread or wool by taking it below the little finger, then go over the ring and middle finger and on top of the pointing finger. I'm putting photos for you all to understand better, this helps a lot, as you don't waste time rolling the thread around the finger, nor does it hurt.


Hope this helps you to understand how to crochet easier, as in this way, by holding the thread or wool, close by with your thumb, it helps to guide you better. Once you get the knack of holding like this, I'm sure that you'll enjoy crocheting. Good luck to all.


For my other blogs, I'm giving the links below, feel free to view and comment too.
https://cancersupportindia.blogspot.com. for all cancer and health related topics
https://gseasyrecipes.blogspot.com. feel free to view for easy, simple and healthy recipes
https://kneereplacement-stickclub.blogspot.com. for info on knee replacement


Monday, August 16, 2021

Little bear- keychain ( TIP- crochet)


The basic bear is not my design, it is from the site below-

The pant is my idea, as I found what was given in the link above would have been too big for my tiny bear. 

TIP- I'ld like to tell the crocheters that when you see a pattern and start crocheting, please remember that the number of stitches, rows will depend on the thread/ wool you're using, according to its thickness, you may increase or decrease the stitches and rows.

I had used less number of stitches than what was mentioned, but crocheted more rows for the pant. Then instead of doing a bow tie, I made a scarf or you may say small tie for my bear. 

As mentioned earlier the keychain with a button is my own idea.

This is a gift for a person who did us a favour. Basically, when someone does some favour, I prefer to return with some gifts/ chocolates or anything according to the age of the person and depending what they'ld like.


For my other blogs, I'm giving the links below, feel free to view and comment too.
https://cancersupportindia.blogspot.com. for all cancer and health related topics
https://gseasyrecipes.blogspot.com. feel free to view for easy, simple and healthy recipes
https://kneereplacement-stickclub.blogspot.com. for info on knee replacement